

I decided to write this post, for the reason that there are many many advanced tutorials on cushion cover making that I want to put up. So, to make it easy for all to learn and understand, here's a tutorial for Basic Cushion Cover Stitching. 

Material Required:
- Fabric
- Matching thread
- Scissors
- Sewing Machine
STEP 1: Measurements and Cutting
Measure the length and breadth of the cushion/pillow for which you want to make a cover and accordingly cut the fabric pieces. Or just follow the easy method - below I have given the measurements (of fabric to be cut) for the most commonly available sizes of cushions in India.

Regular (white color in picture above)
- Fabric pieces to be cut:
- Front Piece - 16.5 inch square.
- Back Piece 1 - 14 inch by 16.5 inch
- Back piece 2 - 8 inch by 16.5 inch
Small:
- Fabric pieces to be cut:
- Front Piece - 12 inch square.
- Back Piece 1 - 11 inch by 12 inch
- Back piece 2 - 5.5 inch by 12 inch
NOTE: Here I have shown the pieces cut for small cushion. Stitching method is same for the Regular or any other size!
.jpg)
STEP 2:
Take the two back pieces. Double fold and stitch one side (12 inch length) of both back pieces, as shown in the picture below:

These stitched ends of both the back pieces will form the opening from where the cushion will be inserted.
STEP 3: Assembling
Keep the front and back pieces facing right side together. Make sure the backside small piece should be above the bigger one, as shown in the picture below.
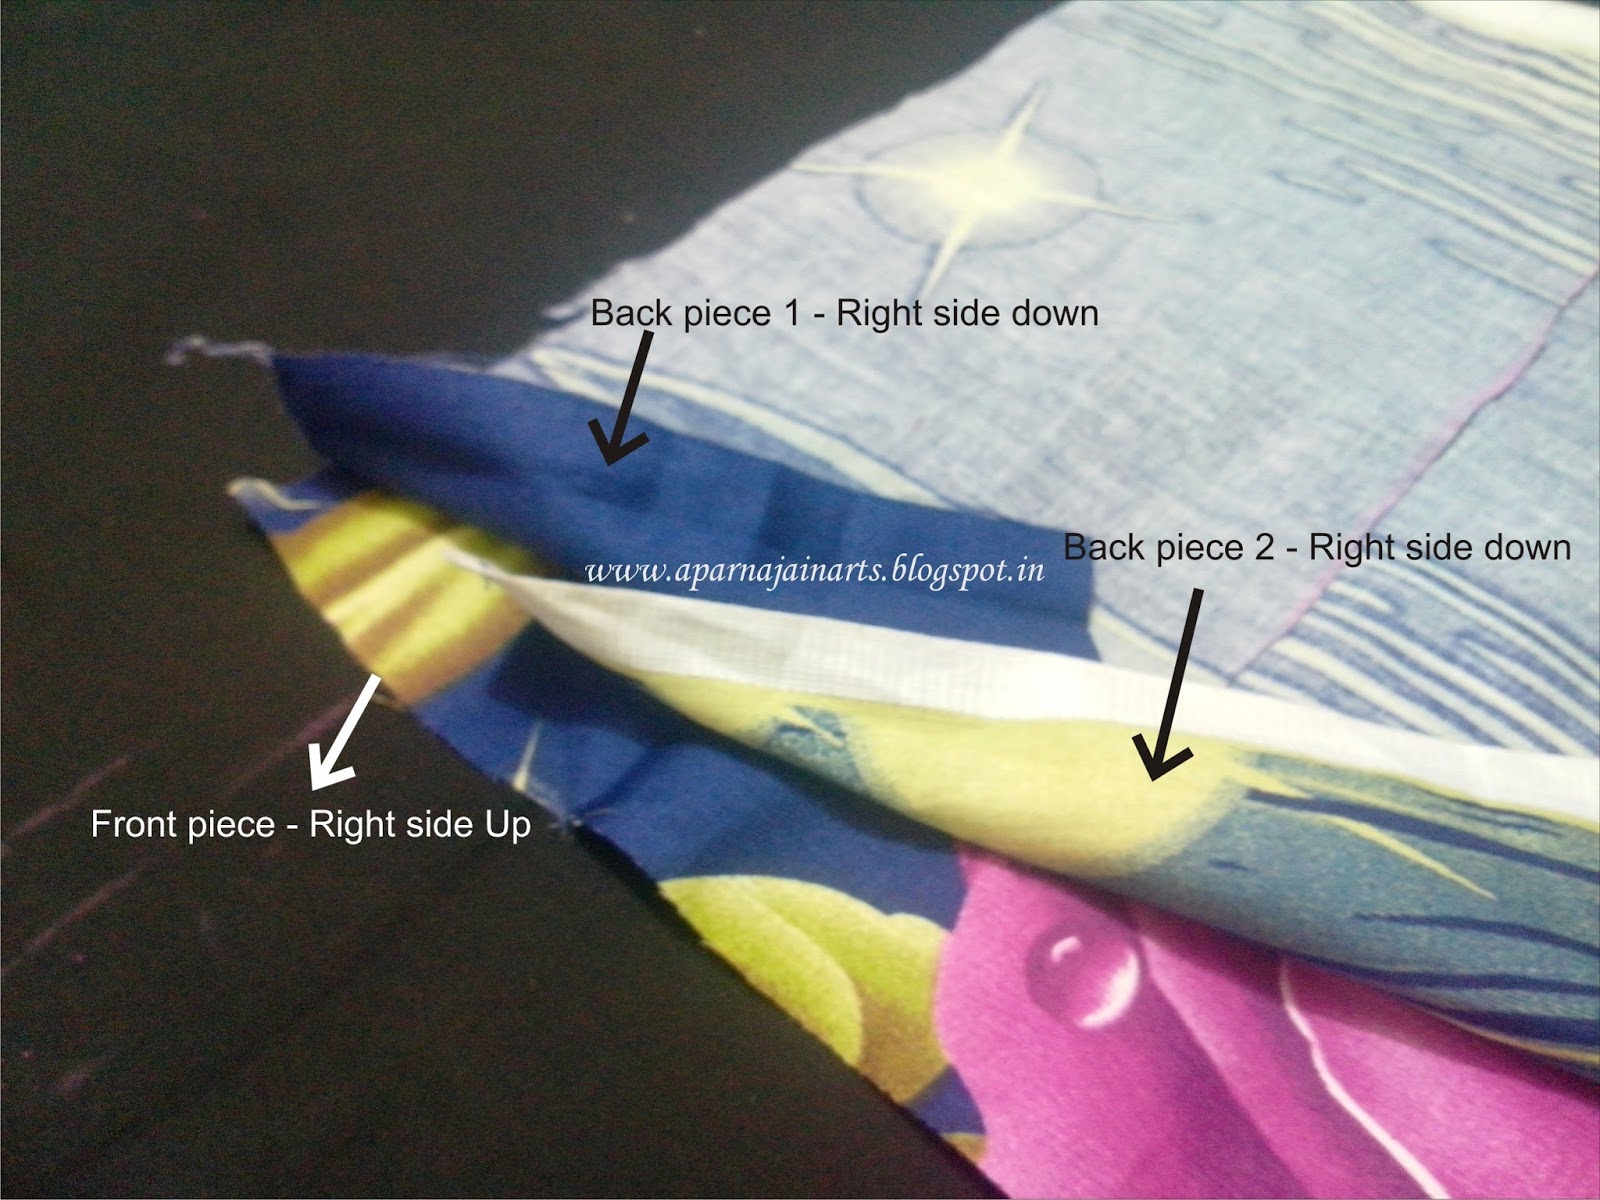
It will look like as shown in the picture below:

STEP 4: Stitching
Stitch on all four sides. Make sure you do not make very sharp points on the corners as it will make those points stand out like dog ears when you will put the cover on the pillow/cushion. Keep the stitch on the corners a bit rounded, for more smooth corners, as shown in the picture below:

Turn the right side up and iron. Ta daahh!!.. your cushion cover is ready!
STEP 5: Adding piping/lace/frill on the edges of the cover
When assembling the pieces as mentioned in Step 3, insert the piping/lace/frill in between the front and back fabric, as shown in the picture below and stitch.

Here's another picture i clicked of the final product! I love the bright colors and the teddy!

Hope you enjoyed this tutorial and please share the pictures of the crafts that you make with the help of the tutorials here. I would love to see them! Till then, Have Fun and Happy Crafting!
No comments:
Post a Comment